How to upload your book to Createspace/KDP
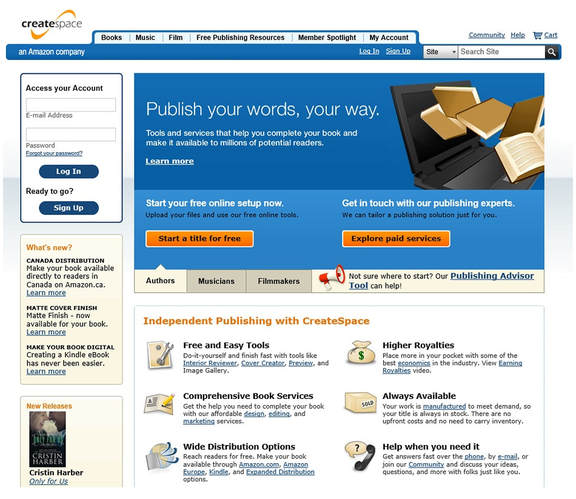
Amazon’s Createspace (or KDP as it is now known) is one of the most popular Print On Demand publishers for indie authors, it’s free to use and you only pay each time one of your books is sold (and even then, it comes out prior to you getting commission). But like everything, if you’ve never used it before it can seem a little confusing, so here is our guide to getting a book up and ready for sale using KDP.
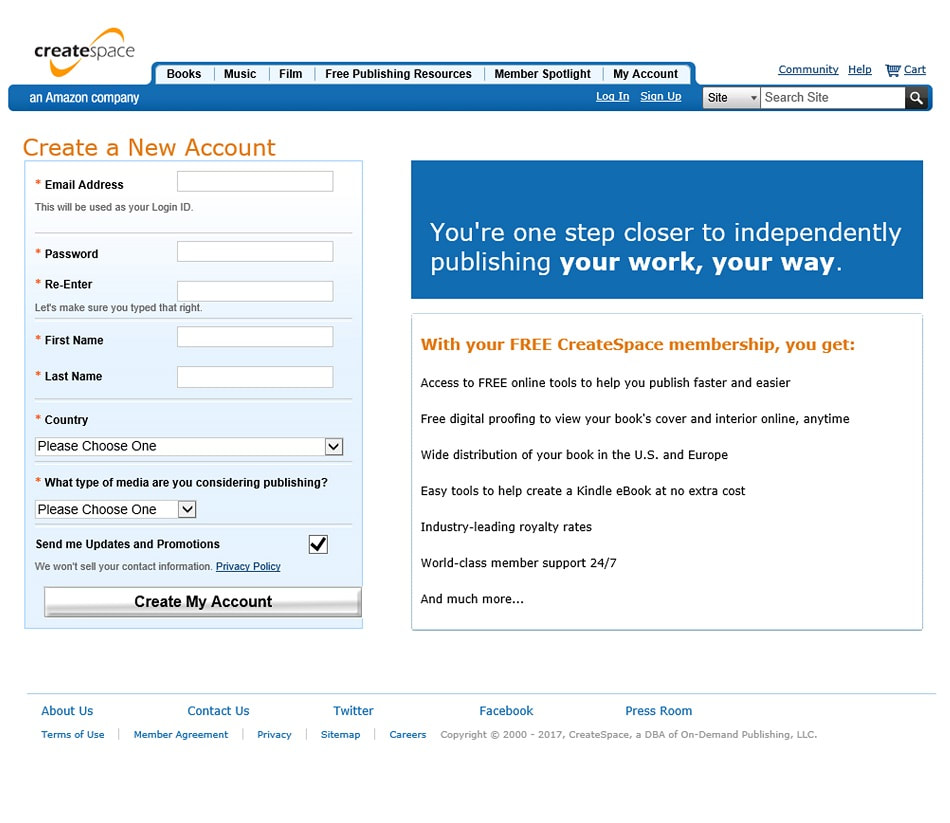
First of all you will need an account with them, but you will need to go to KDP now and then fill in your details in the box provided, it’s the usual of name, email and password, it will also ask what your planning to publish too.
First of all you will need an account with them, but you will need to go to KDP now and then fill in your details in the box provided, it’s the usual of name, email and password, it will also ask what your planning to publish too.
|
|
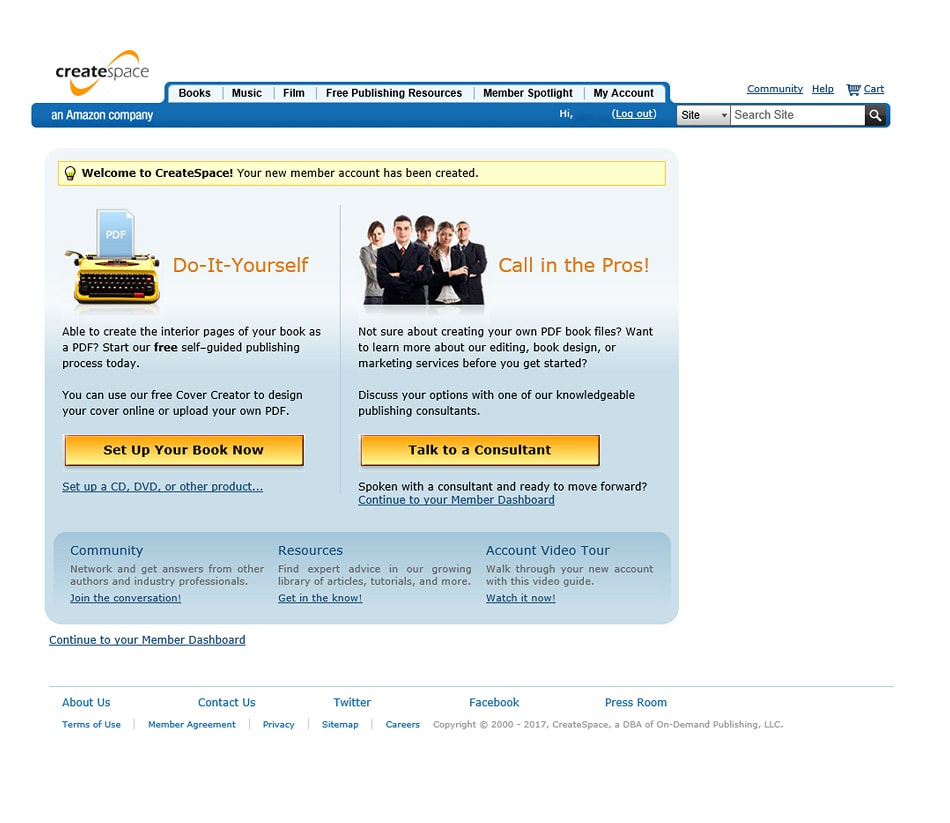
Once you confirm the T&C’s you’ll get the confirmation email, follow the link in the email sent to you by Createspace and you’ll next get the choice of doing it yourself or getting someone from Createspace to do everything for you (for this example we’re looking at doing it yourself).
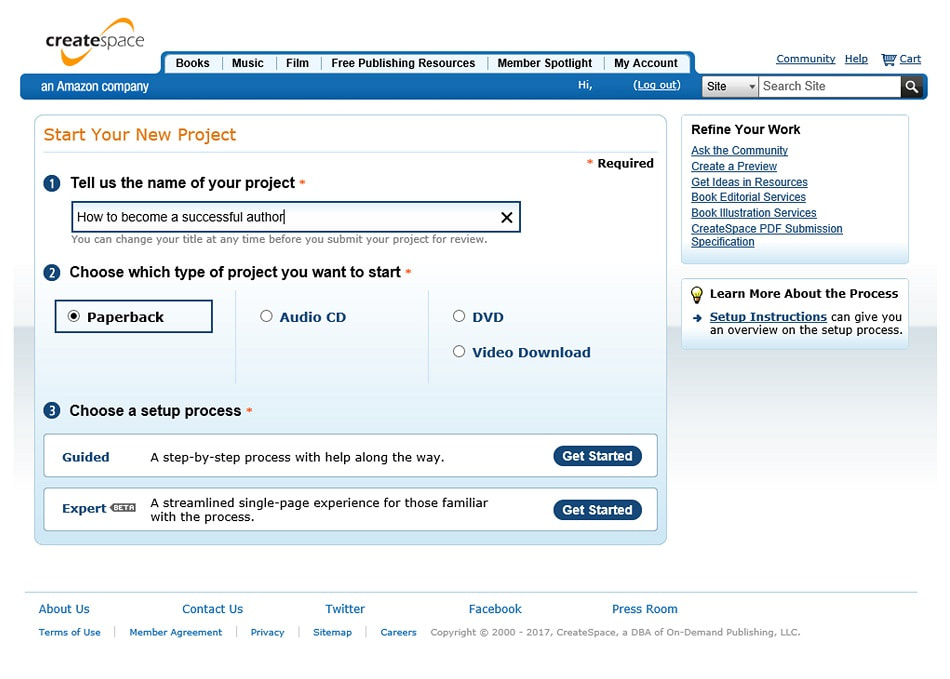
On the next screen you’ll be asked to ‘Start your new project’, here you’ll add the name of the book and then choose whether you want a guided set up or a more streamlined process (unless you’ve done this before it’s best to select the step-by-step Guided process.
Once you click on Guided it will take you through to the setup pages, here it will ask you relevant information about your book, what’s great is that if you’re unsure about any of the questions there is a ‘what’s this’ link beneath each one to give you the answers.

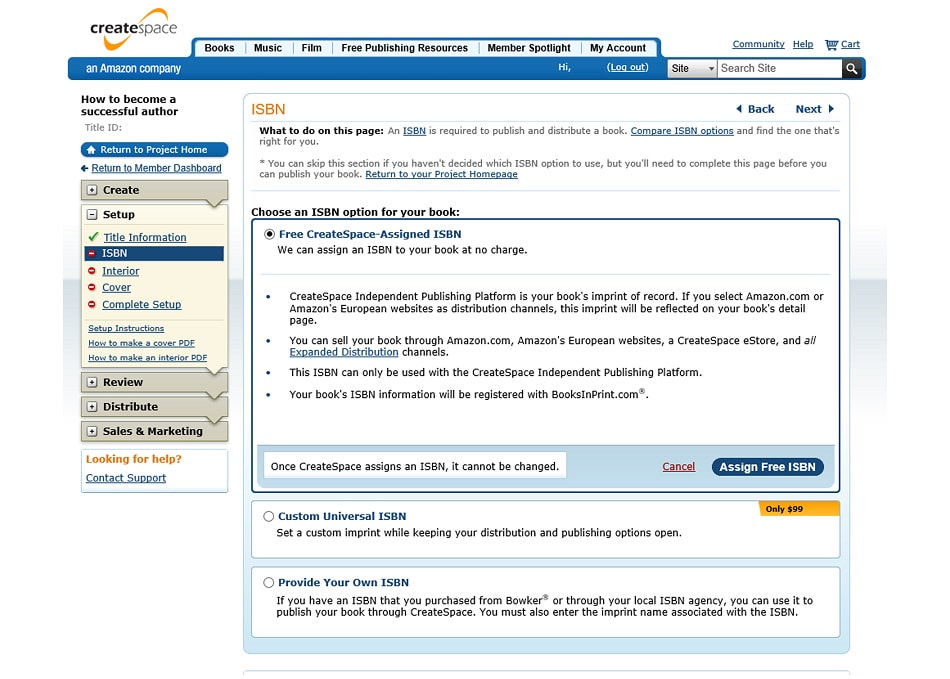
Click Save & Continue and you’ll go through to the next page which is for the ISBN, here you’ll have three options to choose from, the first is using the Free ISBN provided by Createspace (Createspace will become the imprint of record for your book), the second is buying a unique ISBN via an agreement CS has through Bowker, this will ensure you have the imprint of record and control more of the meta data of your book. The final option is if you have bought your own ISBNs and want to use these.
For our example we’re going to use the Free ISBN option (just remember, once Createspace has assigned an ISBN it can’t be changed).
For our example we’re going to use the Free ISBN option (just remember, once Createspace has assigned an ISBN it can’t be changed).
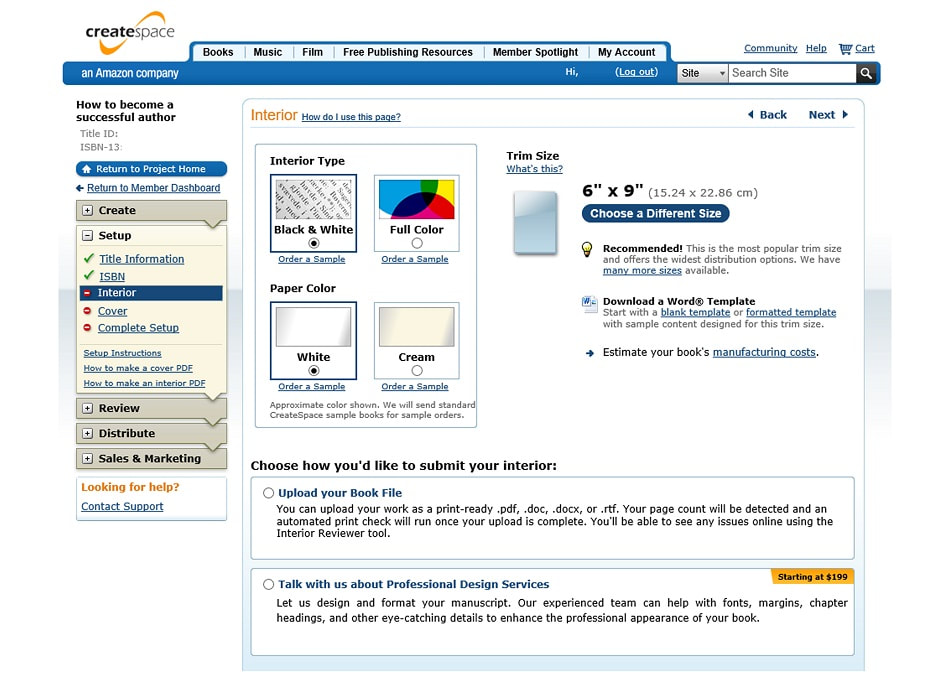
The next section is setting up the interior of the book, this section sets the color, trim size and paper color of your book, most books tend to be B&W for the interior (unless you have illustrations or images within the pages), the trim size is the size the book will be printed as (in our case 6” x 9”) and the paper color will be what color paper the book is actually printed on (for the interior), as a rule, most fiction is printed on Cream and non-fiction white.
|
|
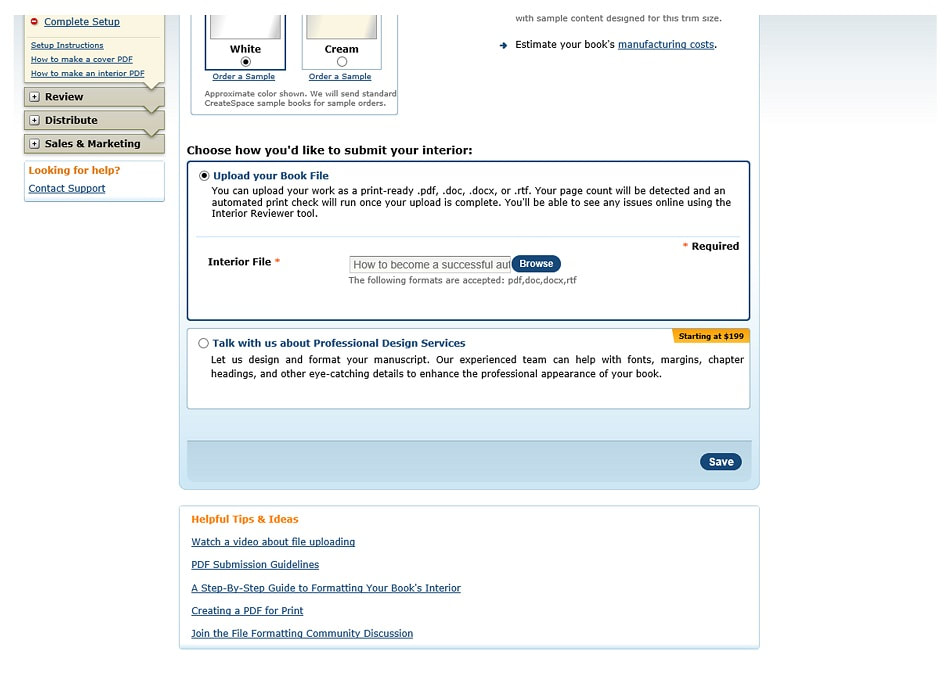
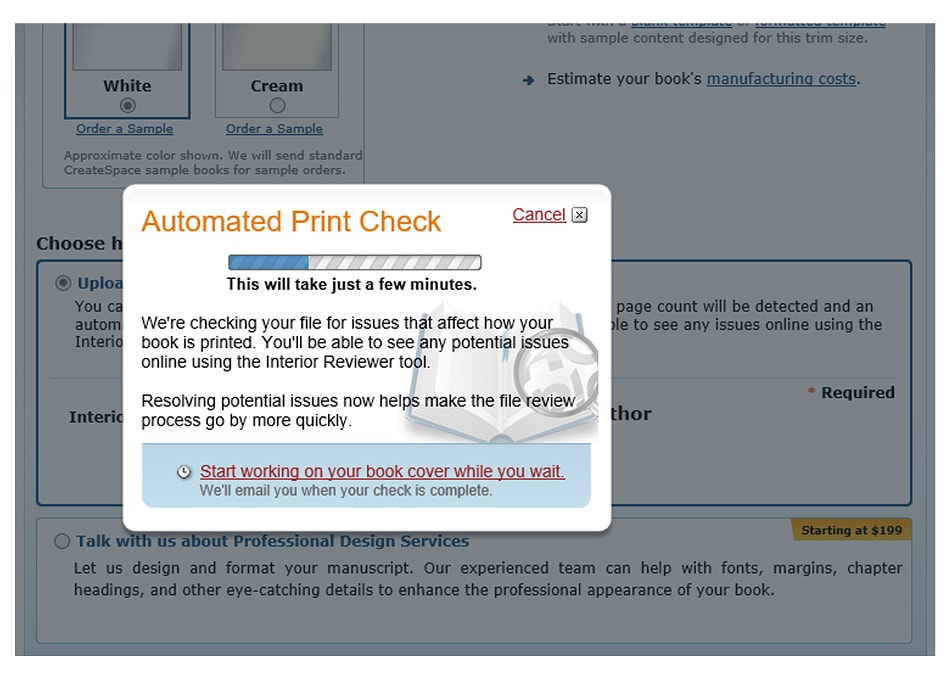
Next click on Upload your Book File and by selecting the Browse button you can select your book’s manuscript ready for upload to Createspace, once you’ve done this, select Save. This now uploads the manuscript and also checks it for any issues that may need to be correcting before going any further (this may take a few minutes depending upon the size of your book).
|
|
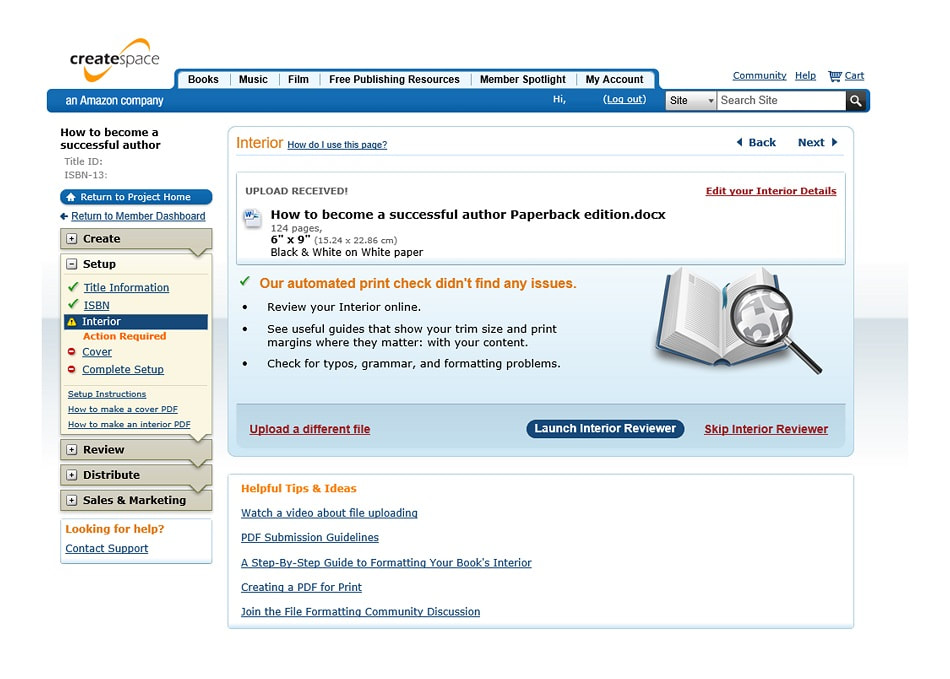
It will next show if there are any errors, take note of the box labeled Upload Received, this will show you the details of your confirmed page count (in our example the book has 124 pages) along with your trim size and paper color too, you’ll need these details for the book’s cover.
Remember, if you are using Word and have written your book on standard letter sized pages, it may need to be resized or formatted correctly to fit your chosen trim size.
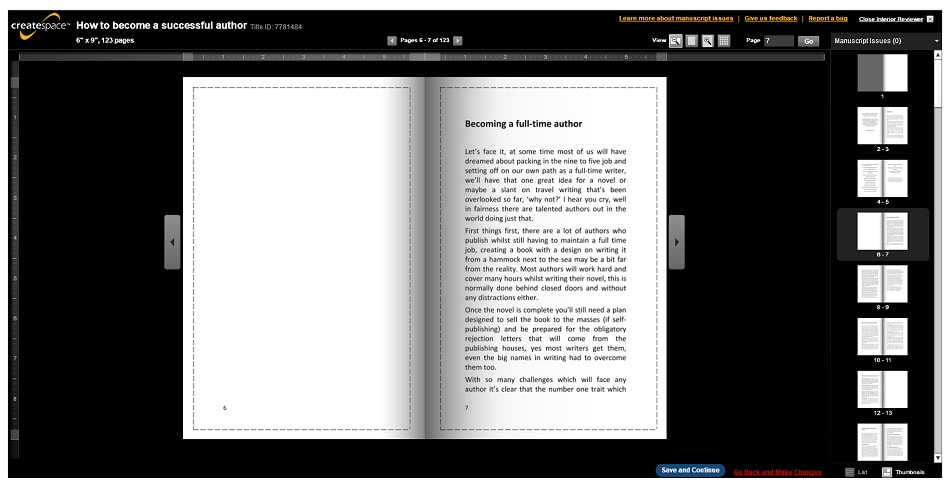
Once uploaded you can check the interior by clicking on the Launch Interior Reviewer button, this loads up a virtual copy of the book, here you can leaf through the pages of the book to ensure you’re happy with the layout and look of it. Once you’ve checked it simply click Save & Continue
Remember, if you are using Word and have written your book on standard letter sized pages, it may need to be resized or formatted correctly to fit your chosen trim size.
Once uploaded you can check the interior by clicking on the Launch Interior Reviewer button, this loads up a virtual copy of the book, here you can leaf through the pages of the book to ensure you’re happy with the layout and look of it. Once you’ve checked it simply click Save & Continue
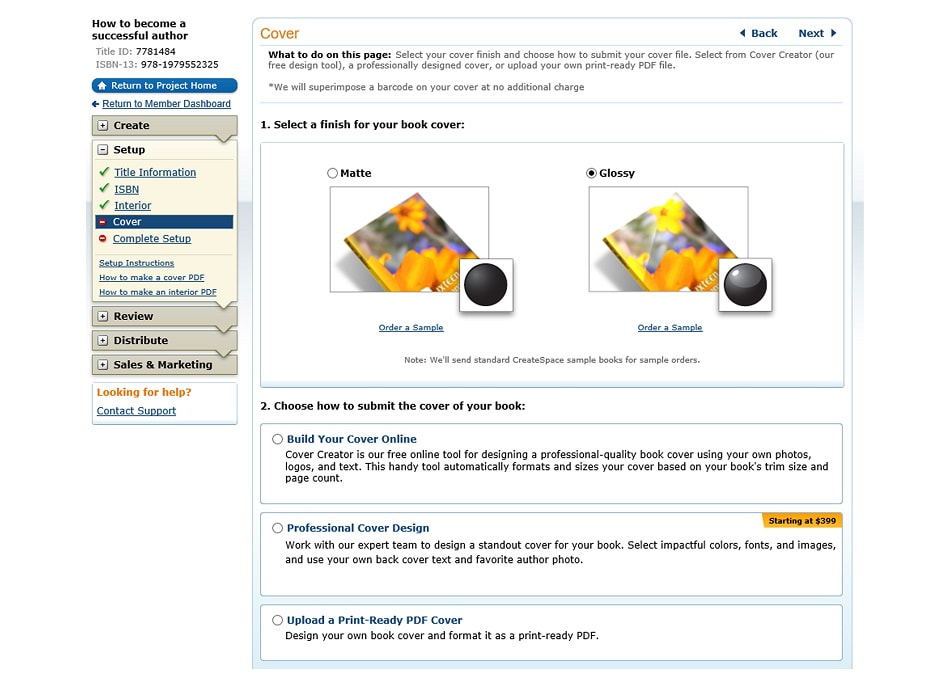
Next, you’ll move on to the book cover design for your publication, the first choice you’ll have is for the finish of your book, Createspace gives you a choice of either Matt or Gloss for your book, this is of course a completely personal choice (both look great upon the cover).
The second choice is for the actual book cover design itself, here you have three options, the first is using the Cover creator from Createspace, this allows you to build a very basic cover to get your book published. The second is using CS’s services, this can be expensive and the service a little basic too. The third option is using your own cover, this will be a cover made by a professional book cover designer which is ready to be uploaded.
The second choice is for the actual book cover design itself, here you have three options, the first is using the Cover creator from Createspace, this allows you to build a very basic cover to get your book published. The second is using CS’s services, this can be expensive and the service a little basic too. The third option is using your own cover, this will be a cover made by a professional book cover designer which is ready to be uploaded.
|
|
For our example we’ll be using Print-ready PDF cover, if you are making your own cover you can get a template from https://www.createspace.com/Help/Book/Artwork.do here you can download a one to build your cover around.
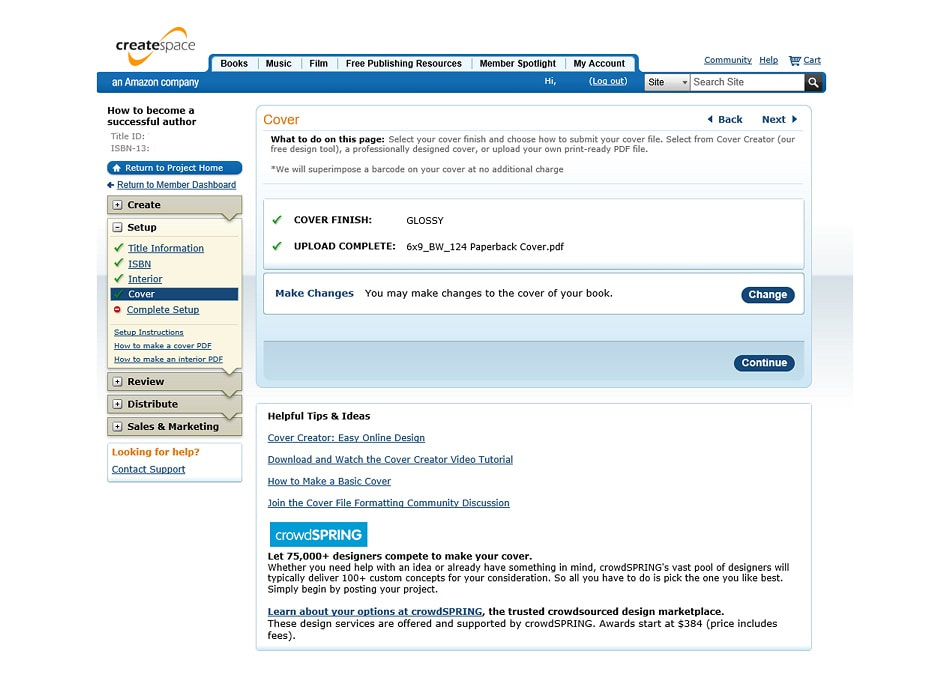
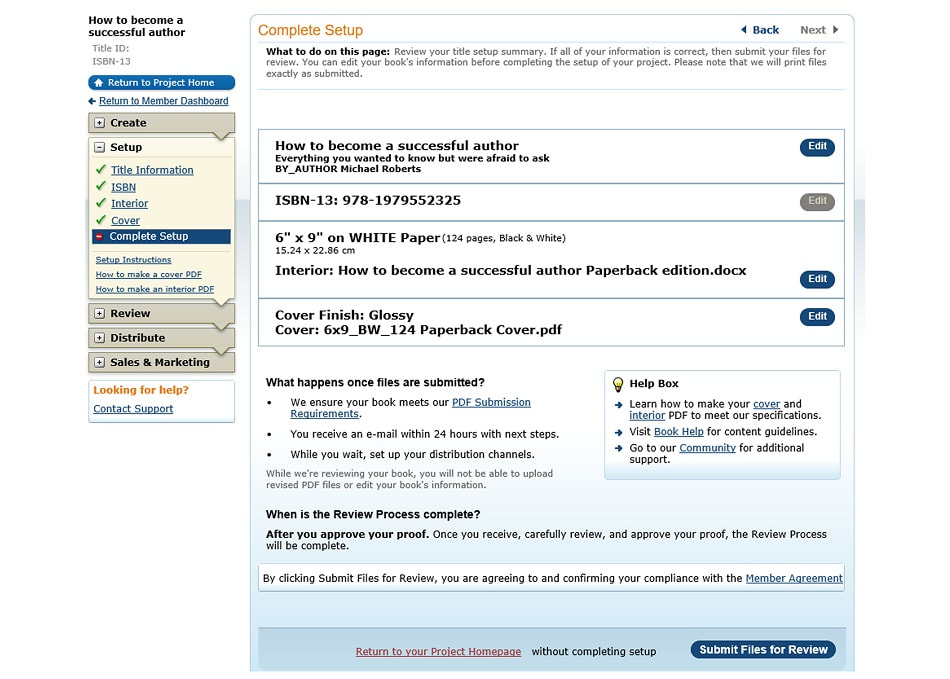
Once you have uploaded the PDF for your book cover design, you next should click on Continue, this take you through to the complete setup section of the process, here you’ll check the details of your book and then click on Submit Files for review (as long as you’re happy).
Once you have uploaded the PDF for your book cover design, you next should click on Continue, this take you through to the complete setup section of the process, here you’ll check the details of your book and then click on Submit Files for review (as long as you’re happy).
When you have submitted this, it will normally ask you to set up the distribution channels.
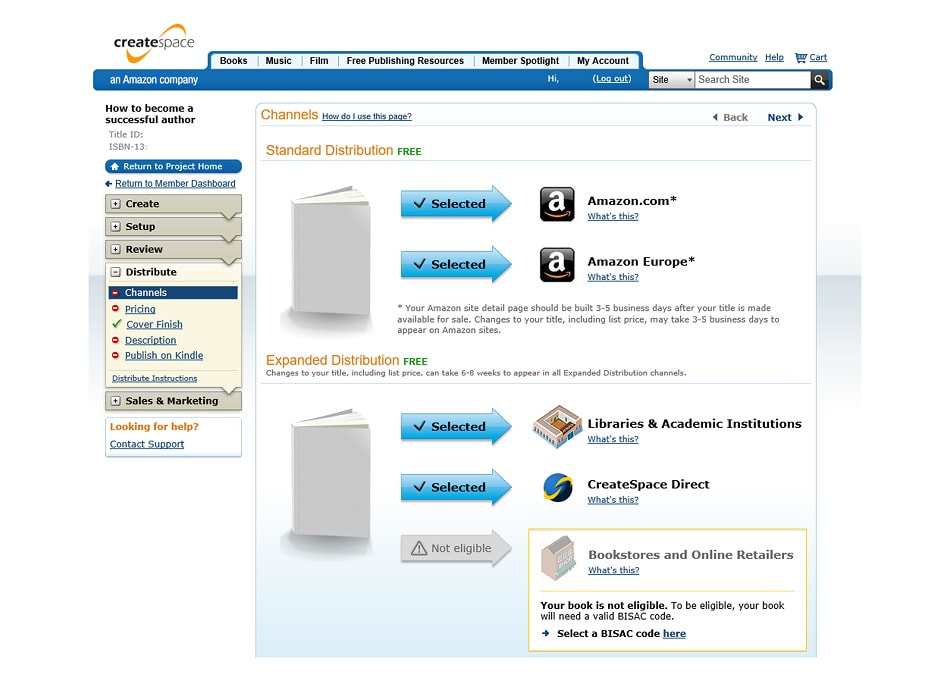
If your account is new it will ask for your details for royalty payments, then it will go to the channel set up. Channel set up allows you to decide where you want your book to be sold, again, if you’re unsure, it does give further details on each option with the ‘What’s This’ links.
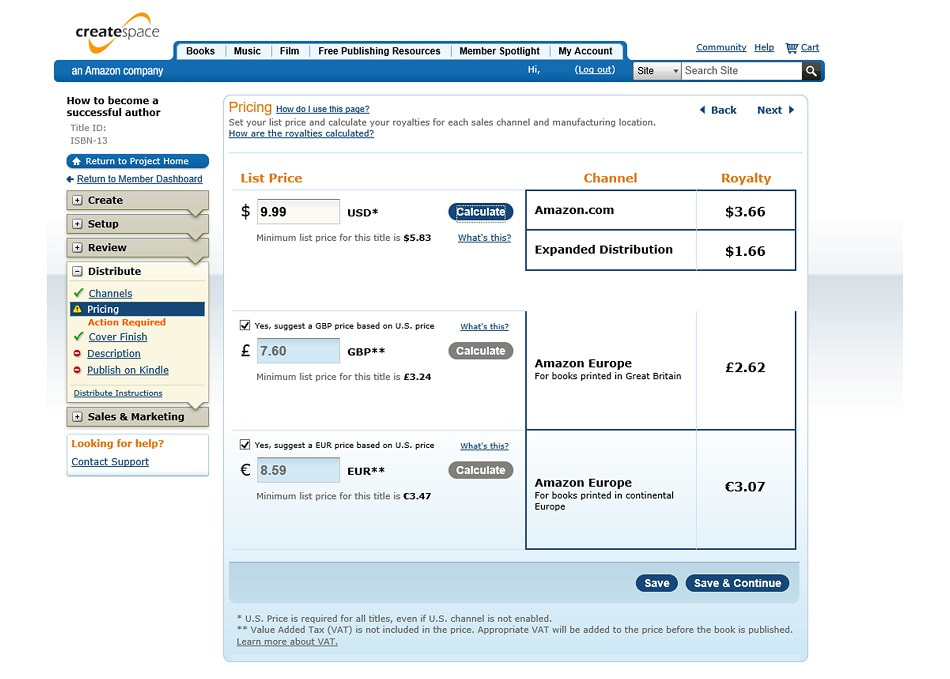
From here the next option will be the pricing of your book, if you enter the prince into the USD section and click Calculate, it will then work out the price in GBP and Euros too. Next click Save & Continue, it will next get you to confirm the cover finish, select either Matt or Glossy and hit Save & Continue once more.
From here the next option will be the pricing of your book, if you enter the prince into the USD section and click Calculate, it will then work out the price in GBP and Euros too. Next click Save & Continue, it will next get you to confirm the cover finish, select either Matt or Glossy and hit Save & Continue once more.
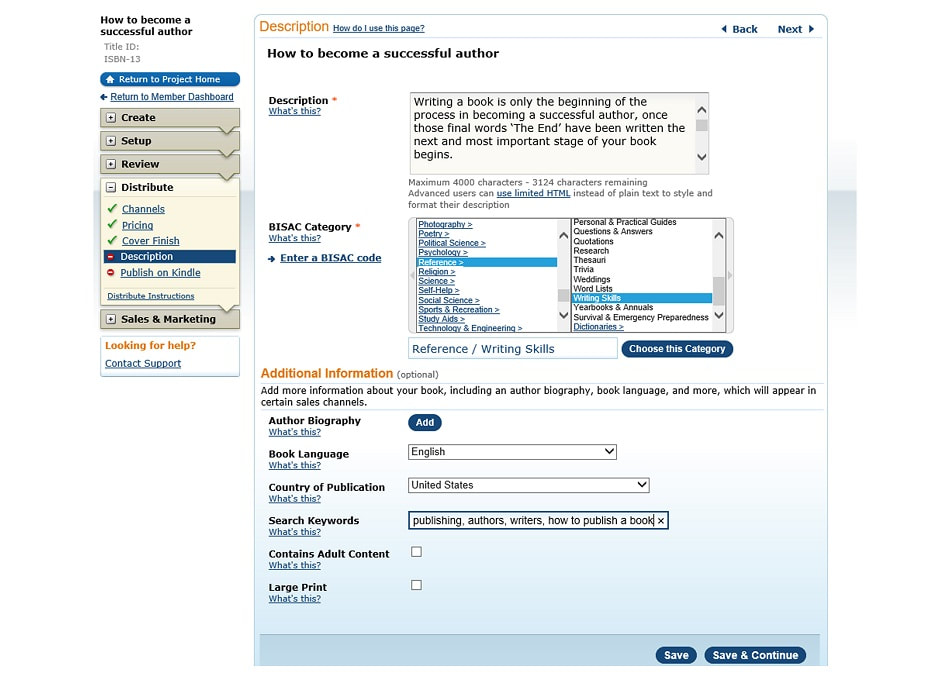
The next section is the description of the book, the detail you enter in here will be used within the sales channels to help readers find your book itself, it’s important to take your time here and enter in accurate detail which best represents your work.
Once you’re happy, click on Save & Continue, you’ll then receive a message telling you that your book files are still being reviewed and that you’ll get an email when the review is complete and your book ready for publication.