CREATING A PRINT-READY PDF
If you are now at the stage of creating a book cover design you will of course have to ensure that the cover is made to the standards required by your printer or publishing service/company chosen. You may find some variation within the specifications asked for by whoever is printing your book but on the whole they will need your design sent to them in a certain format.
In this particular article we look at what will be required by most printers when you upload a ‘Print-Ready PDF’.
The majority of printers will require your book cover design to be created using the CMYK color model and the resolution to be at a minimum of 300dpi (any less than this can cause the book cover to be rejected by them). The resolution should be set when you start work upon the design to ensure no confusion at a later date.
Once you have put any final touches to your book cover you’ll need to create the PDF, for ourselves we use Adobe’s InDesign so the article will take you through the creation of a PDF using this application.
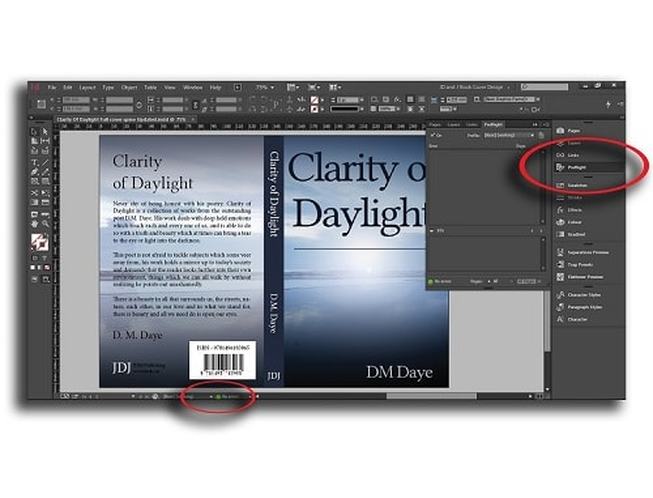
The first thing is to check the ‘Preflight’ dialog box, this will give you any warnings of errors such as broken links, errors with text not showing in boxes, wrong color profiles and so on (the Preflight can be set to your own specific tolerances or that of the individual printer being used).
For some printers/publishers they may ask for your book cover design to have a certain Ink limit set, this will affect how much ink is used in the print run of your book and if you haven’t checked and adjusted this your printer may reject the design.
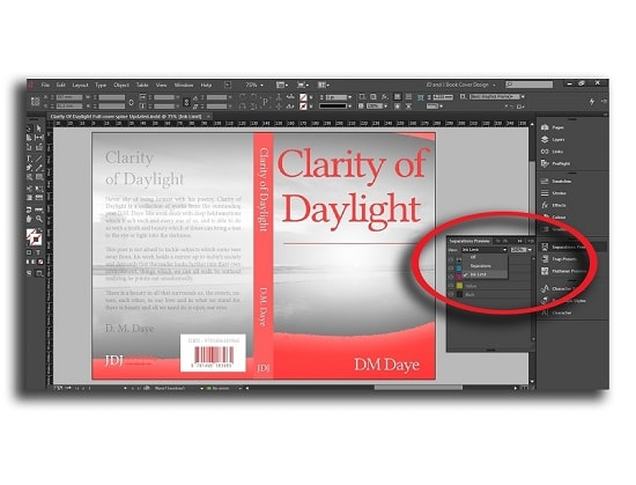
To check the Ink limit currently set for your design go to ‘Window’, ‘Output’, ‘Separations Preview’ (or ctrl + F6) this will allow you to open the Separations Preview panel, in the ‘View’ drop down box select ‘Ink Limit’ and then to the right of this to type in the maximum ink limit for your printer.
To check the Ink limit currently set for your design go to ‘Window’, ‘Output’, ‘Separations Preview’ (or ctrl + F6) this will allow you to open the Separations Preview panel, in the ‘View’ drop down box select ‘Ink Limit’ and then to the right of this to type in the maximum ink limit for your printer.
Once done, anything above this tolerance level will be highlighted in red, if you have any areas showing then you will need to adjust the image file (i.e. in Photoshop) or if it’s the color of text for example, go into the swatch panel for text and adjust the total to below the tolerance level (this mainly affects black). However, for a large selection of printers and publishers you won’t normally have to worry about the ink limits.
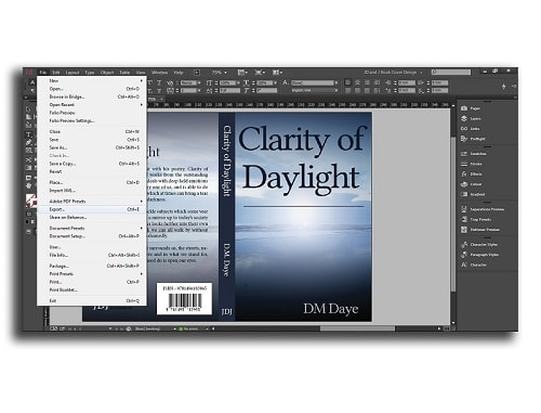
The next step will be to create the PDF itself, to do this you will need to ‘Export’ the document, click on ‘File’ and then ‘Export’ or ‘Ctrl + E’ and then click ‘Save’ when the next box appears.
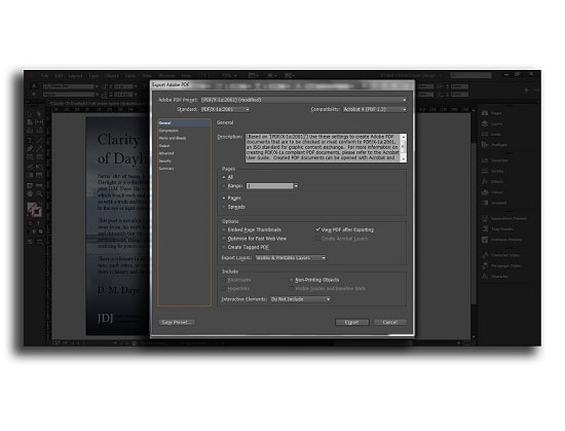
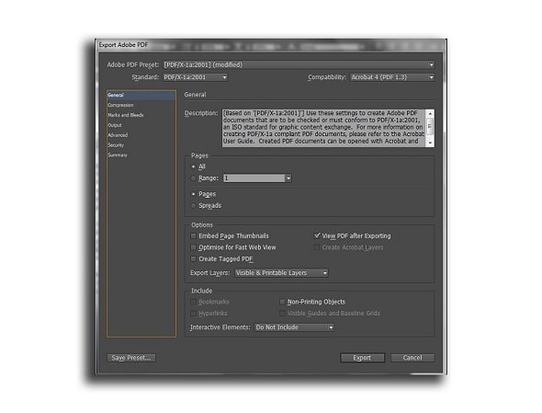
After this you’ll be presented with the Export PDF box.
This gives you options where you can fine tune the export of your book cover design ready for printing, On the left hand side of the box you’ll see a list of specifics starting with General and working down to Summary, by selecting these you’ll have the option to change how the PDF is put together.
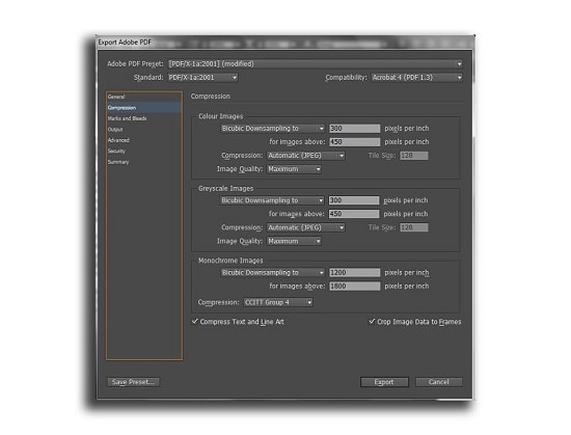
Again, depending upon who is printing your book you’ll vary which options you select, the most common settings will first take you to ‘Compression’, this enables you to downsize the images within your file, some printers will ask for this but most will stick at 300 dpi and above.
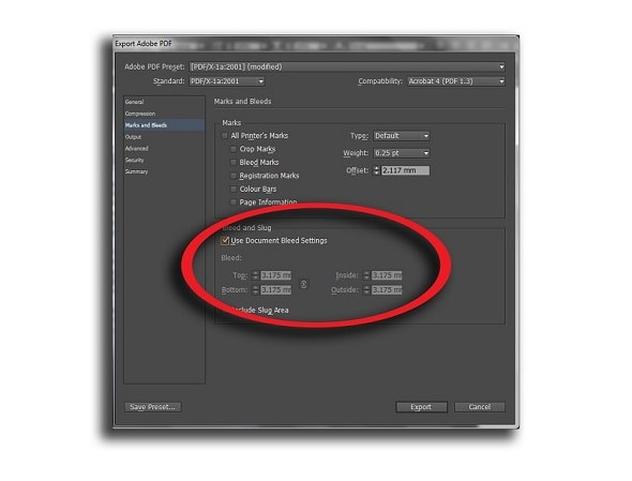
Next is ‘Marks & Bleeds’, here you’ll want to ensure that you tick the ‘Use document bleed settings’ box, for the ‘Printers Mark’s Selection’ consult with your printer, they may or may not want the marks switched on within your design (for example, a lot of the POD services will always ask for them to be switched off).
The 'Bleed' areas are normally sized to 0.125in on all four sides (or 3.175mm).
The 'Bleed' areas are normally sized to 0.125in on all four sides (or 3.175mm).
For the Output you will normally leave as it is, the same with advanced and also leave security unaltered as it could cause issues with the file being opened when sent.
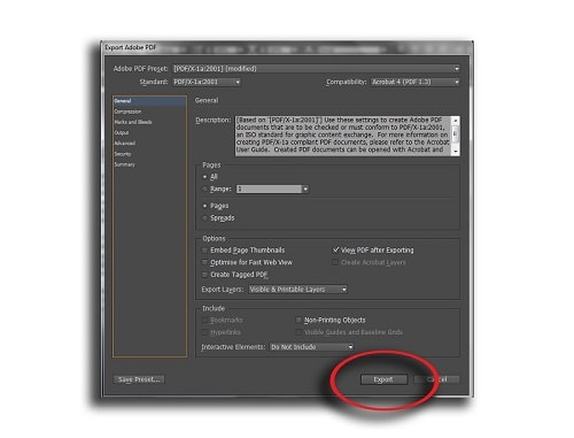
Once you’re happy with the settings chosen and you’ve confirmed with your printing service, now click on the ‘Export’ button at the bottom of the box and your design will be converted into a PDF ready for use as a book cover.
Once you’re happy with the settings chosen and you’ve confirmed with your printing service, now click on the ‘Export’ button at the bottom of the box and your design will be converted into a PDF ready for use as a book cover.
You can find out much more on self-publishing from our Publishing blog, updated regularly with insightful articles created to help every author on their publishing journey.
Book Cover Design from only $50
Get a beautiful book cover design with one of our stunning ready-made designs.
With prices starting from only $50, these one-off book covers will give your book the edge.
With prices starting from only $50, these one-off book covers will give your book the edge.
Want to see more examples of our ready-made book covers? See the link below


