Guest Post by Dean Burgess.
Working from home is here to stay for many of us, but it’s not always easy to stay focused on work when you’re not in the office. If you struggle to concentrate when you bring your work home, a home office is ideal for increasing productivity. A Google search on designing a home office typically turns up articles that only apply to people with spare rooms in their homes. This article explores how someone living in a small space can create a functional home office. The trick is to work with what you have. JD&J Design presents some easy tips for creating a home office in a small living space. 1. Use Underutilized Areas The area beneath your staircase, a rarely used cupboard, and an attic eave make great office spaces. Because no one frequents these spaces, they provide an environment free of distractions. You can also decorate these areas however you like, and no one will complain. Hidden places in the house are often dark, and according to research, poor lighting affects people’s moods and makes them less productive. So, if you decide to use an obscure area as a home office, ensure you use good lighting. The good news is that if you make one of these underutilized spaces truly functional, the improvement can positively affect your home’s value. Buyers like to see upgrades, like new lighting, and functional space throughout the house. So, when you decide to sell - whether it’s now or in the future - your small home office can prove to be a boon to your home appraisal. 2. Define Your Office Space If your home has an open plan, make your office space stand out by painting the area in a different color. An office separation screen or simply a room divider can help to distinguish your home office from the rest of the room. Defining your office space is also essential if you share your room with other people because it creates clear boundaries. Here are more ways to separate your office space and make it functional.
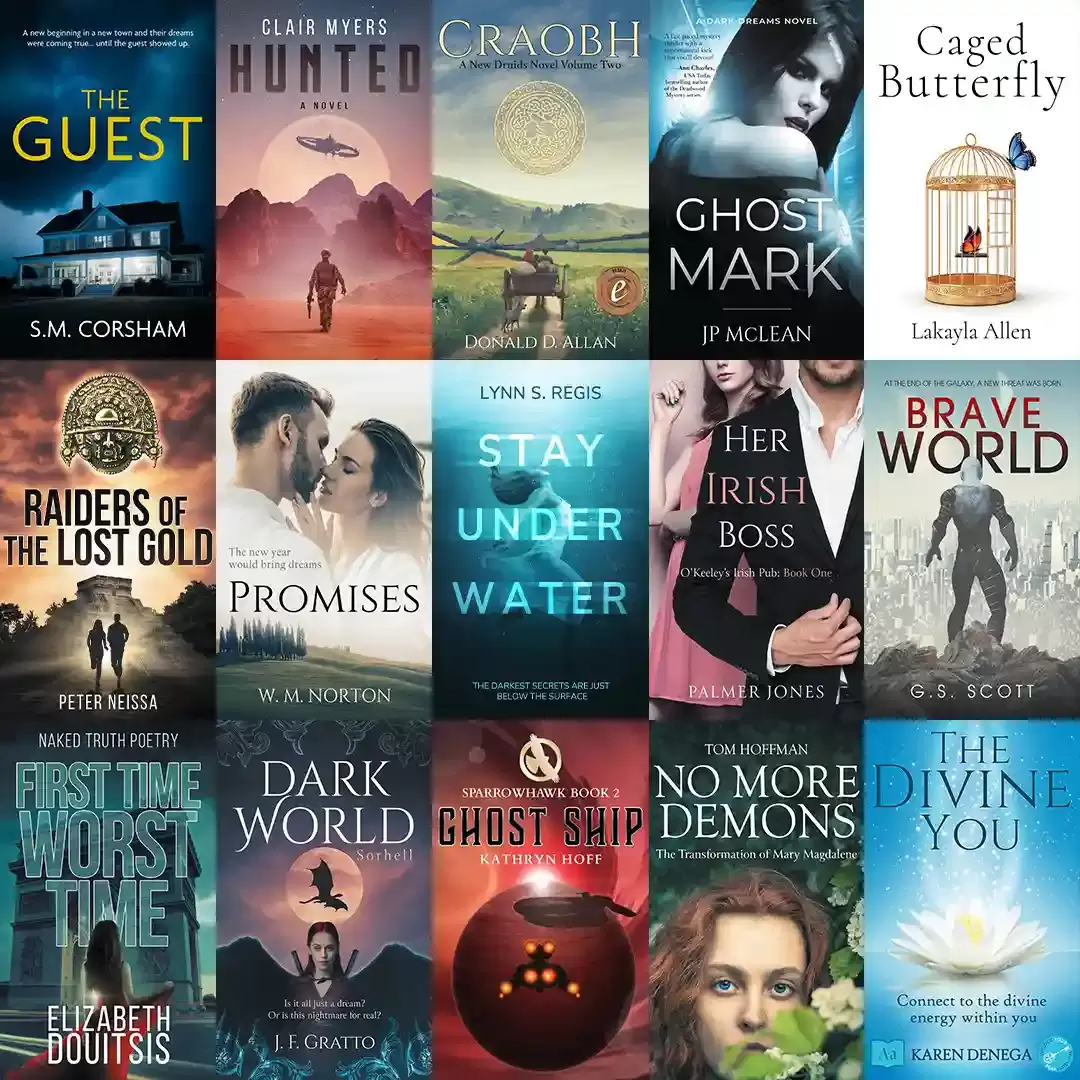
If you simply can’t get the defined space you need in order to make yourself a functional home office, consider refinancing your home to get the money you need to make a few upgrades. Look up how to refinance for details on rates and processes. You might choose to cash out some of your equity to move a wall to open up a space or set apart a space for your office. And refinancing can even lessen your monthly mortgage payments, which can be incredibly helpful, especially if you’re an entrepreneur working from home. 3. Get Organized When your living space is cluttered, it's impossible to find idle space. Working in a disorganized space also interferes with your productivity. Therefore, a critical step in setting up a home office in a small area is getting organized. Find a place to store your paperwork and documents to avoid having things scattered over your desk. Office supplies also tend to clutter a space if they don't have a designated storage place. Filling an area with storage cabinetry negates the goal of maximizing limited space; however, vertical storage works perfectly in a small room. Stacking drawers and installing a rack behind your door are clever vertical storage solutions. A drawer organizer also helps you keep your paperwork and office supplies easily accessible. Another way to create a functional home office is by organizing your cables. Having your legs tangled up in electric cables every time you move them under your desk is annoying and distracts you from your work. Tangled wires also make your office look untidy. A cable organizer easily solves this problem. Create the Perfect Home Office Working from home can provide a lot of flexibility, but it can also come with distractions. No matter how small your home office is, equip it with furnishings that enhance its appeal, functionality, and convenience because the goal is to create a home office that also functions as a true workspace. If you work in publishing or are writing your own book, JD&J Design can create an outstanding book jacket for your new work. Visit our website today to see our work and contact us for more information.
0 Comments
Guest Post by Dean Burgess.
As an author, having the opportunity to share your work with the world can be exciting and motivating, giving you the positive reinforcement you need to keep writing. In the past, it was difficult for writers to get their work published, as they had to bypass the gatekeepers of the publishing industry, like editors and agents. Today, creative writers have many outlets for getting their work discovered and growing a fanbase. This guide provides some steps you can take to get your creative writing discovered. Treat your writing like it's a business If you want to make a living from your writing, you've got to treat it like a business. Start by registering a formal legal entity, like a limited liability company. While you're at it, consider a ‘doing business as’ or DBA name. This will make it easier for you to branch out and offer diverse services under an alternate name. For example, you might have one brand that you use for copywriting services and another brand you use for creative writing. Before you start, check your state's rules on LLCs and DBAs. Each municipality has its own guidelines. Create your own author press kit A press kit is something you can use in social media campaigns, to accompany book launches, or to send to bookstores you hope to promote your work. Writer's Digest explains how to put together an author press kit including contact details, book information, awards you've won, and more. You can also include a resume with your experience, published works, awards, and more. If you have an old resume that's currently in PDF format, you can use a free PDF editor to make changes, download the new version, and share it. Set up a professional author website An author website is a great place to share information about yourself and your work. You can also include a blog on your website, where you share shorter snippets of writing like short stories and blog posts. When you create your website, make it easy for people to access your writing. For example, if you have a book you're promoting, give it a separate landing page. That page should direct readers to where they can buy the book. You might also want to set up a newsletter, where you can keep people abreast of updates. Look for platforms to share your writing These days, writers have many media outlets where they can publish their work. Just Publishing Advice provides a list of options, including Commaful, Wattpad, Inkitt, Medium, Booksie, and StoryWrite. By sharing short stories or excerpts of longer work on these platforms, you can start to attract attention to your writing and build a solid readerbase. You can also raise your profile and attract fans by entering writing contests. Many of these contests are free to enter, so you have nothing to lose. Network to help raise your profile The days when authors would hide behind their typewriters are long gone. These days, writers can help their careers by creating public profiles. Attend author networking events to get to know people who write in your genre, for example. Another idea is to connect with family and friends who may support your career. If you've lost touch with acquaintances who could give you a boost, use a search engine to look them up. Online tools let you look for people based on school, location, and graduation date, connecting you with long-lost pals. As a writer, you want to do all you can to promote your work. Luckily, there are more tools available than ever before to help you do just that. Trust the tips above to guide you. Want more resources to help authors thrive? Visit the JD&J blog. Low content books may be a bit of a puzzle to the majority of the authors who read our blog, after all, an author writes thousands of words because they have passional for either story telling or passing on knowledge to help others, so creating a book which doesn’t fulfill these criteria may not be on the average author’s radar. So, what is a low content book? As you may well imagine (and as the name suggests), it’s a book which has minimal or even zero content within it. But wait, that’s just a note pad, right? Well, it could be. Low content books range from notebooks to journals and planners, to coloring books and scrap books, essentially any book where the reader/buyer has to fill in the pages within it. There are plenty of options for you to choose from, if you want to publish a low content book, here are fifteen ideas of different types of book you can create:
But there are of course other low content books, and if you reflect on your own day to day life, I’m sure you can think of something which would transfer well into this category, maybe something for your work or to use around the house?
What you will find for most low content books, is that they are given as gifts to other people, so it is important that the book looks appealing (so, don’t skimp on the book cover and interior). Make sure you do your research, if you are creating a journal for example, do your pages have enough room to easily write upon, are the lines spaced out far enough, is publishing in hardback a better idea than paperback (and for a journal it probably is). Look at other journals and see what works and what doesn’t, you can create a great journal which people will love, if you research beforehand. Also, order a copy of your book prior to launching fully, it’s not until you actually get a really printed version of the book that you can see if it works as something to write in, if it does, great, if not, adjust and re-upload. In an era where everyone goes by online ratings, you want to ensure your book is well received from the very beginning. There are opportunities with low content books, but you really have to do your research first, chose an area which interests you and again research it before you start to create. You really need to make sure your cover and interior look appealing and of course, get a test copy before you do a full launch with your new book. KDP Select and you
As an indie author the self-publishing process can seem like a long and daunting road, from the moment you finish writing your manuscript you are faced with countless choices on how to bring this masterpiece to the public. Selecting editors, proof-readers, formatting, book cover design, advertising and of course, a printer or print on demand service, it can seem endless. Being one of the industry leaders, KDP is a very popular choice with self-publishing authors looking to utilize the publishing wing of Amazon for their own book. And being part of Amazon, it does give you a large reach to wide range of readers in multiple countries. If you have decided to use KDP for your book, then you will have noticed an option they offer with KDP select. So, what is KDP select and is it work signing up for? Okay, KDP Select is a program where you opt to sell the digital edition of your book exclusively via KDP for a 90-day participation period, this means that your eBook cannot be sold anywhere else (that even includes selling it on your own website or blog), you can see the full terms for the fine details. After this 90-day period you can choose to auto-renew or leave the program, what’s great is that your printed version of the book can still be sold via KDP and can also be sold via any other distributor while enrolled in KDP select, again, KDP select is just for your digital version of the book. So, why would you enroll in KDP select? Well, the first benefit is it makes the book available through Kindle Unlimited, this being a subscription program allowing users to read as many books as they like (and of course, your eBook will still be available to buy as normal). It also makes the eBook available to borrow to many international readers. This can help in the ranking of your book, and you can also earn royalties from Kindle Unlimited, these royalties are paid on a per page read basis, so the more of your book that gets read, the more you can earn. Earn 70% royalties on eBooks sold to readers within certain countries. The program is also free to join and gives you great promotional tools to sell more books, promos such as countdown deals, free book promotions and Amazon’s literary contest. Calculating royalties These come out of KDP’s select global fund each month, this is based on multiple factors which include exchange rates, customer reading behavior, and subscription pricing. Author’s earnings are then calculated by their share of total pages read (up to 3,000 pages per title). The example KDP uses is of a total fund of $10 million for a month with 100 million pages actually read, if this were the case, then: An author’s eBook with 100 pages which was borrowed and read completely 100 times would earn $1000, calculated as follows: 10 million (KDP total fund) x 10,000 (total pages read for this author) ÷ 100 million (total pages read via KDP select) However, and author’s eBook which had 200 pages and was only read halfway through on average would earn $1,000, again, they base payments on pages read. You can see their in-depth details on royalties here. How do they calculate pages read of your eBook? They use a system called KENPC (Kindle Edition Normalized Page Count), this calculates a count using standard formatting settings for font, line height and line spacing etc. non-text elements such as images, charts, graphs illustrations will also go towards page count. The system has been created to work across all devices and user settings upon those devices, all geared towards giving a more accurate count for each book and author. So, is it worth joining? If you are only selling your eBook via Amazon, then yes, however, if you are planning to sell the eBook via multiple other websites (including your own) then KDP select may not be for you. KDP Select does offer some great promotional tools and benefits (along with having your book on a platform with a massive reach with Kindle Unlimited), it is certainly worth considering, even if you only use it for the 90 days. The Alliance of Independent Authors describes the self-publishing industry as “a beautiful, bubbling, chaos, typified by abundance and diversity, driven by authors [...] from all sorts of backgrounds and approaches, bringing together the most forward-thinking creative minds in an environment where they can freely create.” Although most self-publishing platforms don’t release data on their book sales, the numbers are likely higher than we know because this method of publication enables authors to reach more readers than traditional publishing allows. One interesting market that has thrived in self-publishing is horror fiction, with sub-genres like supernatural, post-apocalyptic, slashers, and the vampire/werewolf/zombie niches. Self-publishing works well for horror writers because they have the freedom to publish work which may not find a home in traditional presses. Although horror is a highly versatile genre with dedicated fan bases, it’s found to be difficult to sell. Self-publishing opens doors for horror writers to get their ideas out into the world. Here are three tips if you’re thinking about self-publishing horror fiction: Learn from the masters of horror literature
First, writers working within a genre should be intimately familiar with its best storytelling techniques. It helps to read beyond horror novels themselves, as there is plenty of good advice available from leading authors. Case in point, On Writing: A Memoir Of The Craft by Stephen King offers not only perspectives from the life of a bestselling horror writer, but also examines crucial aspects of the art of writing — including tips on plot, character development, work habits, and rejection. By looking at the experiences of people who came before you, you can avoid similar pitfalls. You should look into different formats of horror as well, like comics and movies; for instance, films like Get Out and Midsommar have raised interest for the genre by examining relevant social themes. In the self-publishing industry, you have a broad allowance for original ideas, so it helps to cultivate a deep understanding of what has been overdone and what else you can possibly do. Once you’ve polished your draft to perfection, you’re ready for the next step. Choose the right self-publishing platform When it comes to horror, self-publishing is the fastest way to get your story to a wide audience. Of course, this involves significant investment on your part; not only will you have to write a good book, but you will also need to pay for editing and cover art design. Research how the self-publishing industry works, because factors like royalties and publishing dates may differ. The Book Business: What Everyone Needs to Know could be a good reference to start with, as it can answer key questions you may have on publishing. You should also look into the self-publishing platforms available. Although there aren’t any prominent platforms for horror specifically, many writers turn to Kindle Direct Publishing by Amazon, which publishes your e-books immediately, in exchange for a commission from your sales. Promote your work across channels The last step in self-publishing is to promote your work across channels. Publicity is just one of the many tasks you have to manage, and you’ll need to work hard to stand out. Before, online message boards and a website were the only tools; now, social media has expanded your options. There are plenty of Facebook groups and Reddit threads dedicated to horror fans, although you can try TikTok if you want to reach younger readers. The goal is to actively engage with readers and market your work through these forums. Before you get into the bulk of your promotions, it’s best to ensure you have good promotional materials. As we discussed in our post called How to Promote Your Book in 2022, you need to have consistent branding across channels. High quality images of your amazing cover, plus professional-looking banners and ads that will catch readers’ attention. JD&J can help you with this aspect of publicity. Since 2013, we have supported indie writers with well-crafted designs so they can have the same advantage as best-selling authors do. Contact us today to learn more about our services. Specially written for JD&J.com By: Rebecca Juliana They say that in every person is a book, so if this is the case, why is it only some of us go on to write, edit and publish this book? How many laptops have folders with the beginnings of a manuscript in, always started with the very best of intentions, only to be slowly put on the shelf after a couple of months?
The thing is, we all have great intentions but when the effort becomes too much, so many stop being consistent and gradually stop, the result is a half-finished project/objective, further cementing a belief in our subconscious that somethings are just too difficult. And the reality is that yes, somethings are hard, but once you make the progress toward your goal a habit, and stick religiously to that habit, irrespective of how challenging the goal may be, you have a far better chance of achieving it and being successful. Now for me, this goal came with trying to increase fitness levels and get back in shape, so during lockdown I decided I would start running. Using a running machine at first, I would run (slowly) for five minutes, getting off the machine and thinking I was going to pass out afterwards. Each week I increased the length of time and distance and then began to road run alongside the treadmill. Now I compete in charity races, running 5Ks every other day and a 10k at the weekend. My point being, that at first it was hard, I was sore, tired and could always think of an excuse not to go for a run, but over time I turned the running and exercise into my daily routine, it became a normal part of my day and just something I did without fail, I now look forward to it and keep pushing my goals further each week. Forming a new habit takes about 30 days, so for that first month you have to dig deep and stick to your goal, for the running, it meant breaking down my exercise into something that was challenging but not unrealistic, if I could realistically exercise for 30 minutes per day, then I did that (ensuring that I took Sat and Sun off to recover). Again, every week I increased the challenge/target for myself, this ensured that I grew, didn’t injure myself and kept motivated. But wait, what has running got to do with writing a book? It’s comparable with regards to your goals, targets and plan on how to achieve them, no one starts of thinking ‘I have never run, so next weekend I’ll complete in a marathon’, and it’s just the same with a book, no one (who wants to write a well-crafted book that is) thinks I’ll knock out a 90k word book over the weekend and publish it to critical acclaim on Monday. Breaking down your end goal into smaller steps has been shown time and time again to be a sure-fire way of being successful, and more importantly, a way of ensuring that you don’t feel overwhelmed by the goal ahead of you. So, if you have a goal of writing a great book of 90,000 words or so, that is well edited and proofread, be realistic in your timeframe and how much time you will spend on it each week. Keeping in mind that everyone’s lifestyle is very different, and our commitments will dictate how much time we can spend writing. But we can all figure out a daily routine which will fit us as an individual, one that we can stick to, and which will ensure we hit our goal. For the case of a 90,000 word book, it breaks down to writing 1,731 words per week for a year (or 248 words per day), for most people, this is very realistic and something you can make a routine out of, for others they may be able to achieve this with daily writing over a six month period, and for people with very heavy commitments, completing their target would need to be spread out of 18-24months instead. Whichever way YOU do it, it should be personal to YOU alone, the main point to remember is that goals are achieved by taking one small step at a time. So, keep taking those small steps, and change your routine to one which will take you to your goal. One of the most popular print on demand services today is KDP, being part of Amazon it has a massive distribution and free to upload your book to, which is another reason why so many indie authors chose Kindle Direct Publishing. However, a common question we get asked is, ‘how do I upload my book to KDP?’, well it’s easier than you may think (and if you’ve done it before, you’ll agree, however, if you haven’t yet uploaded your book, here’s a quick guide which you may find helpful. First, go to KDP and create your own account, it’s free and doesn’t take long to get up and running. Once you have an account, each time you log in you’ll arrive at the ‘Bookshelf’ page, here you can create your first book and it will also show you the titles of books which you have already published via KDP. To create a book, click on the +Create yellow button. The next page will ask what type of book you are creating, for this example we’ll look at a paperback, so click on the ‘Create Paperback’ button. Now you’ll get to the part where you’ll enter some details about the book itself. Language The first question it asks is about the language of the book, KDP supports 37 different languages for print and a further 7 for eBook alone, you can see the full list here. Book Title Next it will ask for the title and subtitle of the book, KDP does have guidelines on what can and can’t be used for titles, so it is worth taking note prior to settling on a title. Series The third option is for a series of books, you don’t have to have the series complete to select this, it can help with readers finding your book, so it you are publishing a series, this should be selected (you can see more on series with KDP here). Edition Number Scrolling further down the page and you’ll come to the edition number, so what is an edition number? KDP lists it as follows: An edition is a particular version of a book. The edition number tells readers whether the book is an original version or an updated version. If this is the first time you have published this book, enter the numeral 1. If the book was previously published and the version you are publishing contains significant changes, enter the numeral 2 (and so on). Author Next, you’ll enter the Author details (note, this cannot be changed once you have published the book) Contributors Under the author is the box for contributors, this gives you options for adding editors, illustrators, forewords, and you can add to this (let people know who designed your book cover). Description The Book Description box is well worth taking your time with, here you’ll add a description of the book that Amazon shoppers will read to learn more about it, so it needs to be captivating and focused on your potential reader. KDP offer a guide on how to write a book description, it’s well worth checking out before your start, so if you need time, go to the bottom of the page and click on the ‘Save as Draft’ button, you can then come back and finish off once you are happy with your book’s description. Publishing rights Here you have two options for your book, the first is that you own the copyright and hold the necessary publishing rights (as KDP put it: Choose this option if your book is under copyright and you hold the necessary rights for the content being published). And the second is that your book is Public Domain work, (as KDP put it: Select this option if you are publishing a public domain book. Keep in mind that the duration of copyright varies between countries/regions. So, if your book is in the public domain in one country/region but not another, you must identify your territory rights accordingly.) You can find out more from KDP’s site here Keywords Keywords are what will help readers find your book, there is so much information available and a quick search on YouTube or publishing forums will give you more detail than you’ll ever have time to look at, however, KDP have put together some information on this and their help page for keywords is worth a look before you enter any keywords Categories You can currently choose two categories for your book, again, this will help readers find your book, so take your time and select the most appropriate ones for your publication. Adult Content Here you will select whether your book is appropriate for people under or over the age of 18. Once you have filled in all of these areas and are ready to move forward, click on the yellow ‘Save and Continue’ button at the bottom of the page. Print ISBN Here you can either upload your own ISBN or use one of KDP’s free ISBNs, now there are pros and cons to using either, KDP have an article listing everything you may want to know here, so, take your time to decide prior to moving forward. Publication Date If you are publishing for the first time many authors will leave this blank, or if you are planning a future launch, you can select the date in this box, KDP have this to say about publication dates: Your publication date is the date on which your book was first published. You cannot change it after publishing your title. If you leave this blank, KDP will automatically use the date on which your book goes live (i.e. it is available for sale) on Amazon. Print Options Again, another important section for setting up your book, here you’ll let KDP know the size, paper choice and trim selection for your book. Ink and Paper type - KDP books can be printed in black and white, standard color, or premium color. Standard Color offers a good balance across price and quality, but is not available in the Japan and Australia marketplaces. Premium color provides a more vibrant, crisp color. You can find out more about Paper Type here. ![]() Trim Size – This is the size of the book once it’s been printed and cut to size. Bleed Settings – This is an area (normally 0.125in) on the outer edges of the book which is trimmed off when the book is cut to size, these areas are not usually required for books which just have text alone, but where you have graphics/art/images which go to the edges of the page, you normally extend them so that when the book is cut, you don’t end up with white lines along the outer edges. You can find out more about bleeds here. Paperback Cover Finish - here you can choose either matt or gloss for your book cover’s finish, both look great but there are traditional selections for each one, KDP give further details here. Manuscript Here you will upload your manuscript of the book, KDP give you several options for upload files, they do recommend you use a PDF, but you can also use DOC, DOCX, HTML or RTF, you can learn more about formatting your book from KDP’s Book Formatting Page. Book Cover Next, you’ll either upload your completed book cover or use KDP’s Cover Creator, obviously we are going to recommend you use a professionally made book cover design that has been sized for your book and will be unique for your title. If your book cover already has a barcode, make sure you check the box to confirm this, if you are using the free ISBN that KDP issues, leave this box unchecked as KDP will add a barcode to the book cover for you. Book Cover Preview This is the last of the options on this page, click on the yellow Launch Previewer button and it will get ready to show you a digital preview of your book (this may take a moment or two). This will now show you a copy of your book and allow you to go page by page through it, if there are any errors it will show you where they are, if you have any, you’ll need to adjust your book and then reupload. So, take your time and go through each page to fully ensure that you are happy prior to moving forward. Once you are fully satisfied, you can click on the yellow Approve button (bottom right of screen). This now takes you back to the Paperback Content page, where you can click on the yellow ‘Save and Continue’ button, again, in the bottom right of the screen. Paperback Rights & Pricing page Territories Select where you have the rights to distribute your book, you can choose either worldwide or individual territories, you can find out more from KDP about Distribution Rights here Primary Marketplace Select where you expect the majority of your book sales to be from. Pricing, Royalty and Distribution Here you’ll select the price of your book for where it’s being sold and the royalties you will get in return, KDP have two options for royalties of either 35% or 70%, KDP also have a useful guide on pricing that is worth taking a look at. It is also worth looking at what other books within your genre are doing with regards to price, getting that sweet spot for price can sometimes feel a little trial and error when first publishing, so do your research first. Terms and Conditions
You confirm that you agree to them once you click on the publish your paperback book button Request Printed Proofs In the green bordered box, click on the Request printed proofs of this book link, this will allow you to order a copy of your book prior to publishing, this is worth doing so you can get the chance to read a printed version of the book prior to going live, it’s amazing how many additional edits to the manuscript you find when reading a printed version. Finally Once you are happy with everything, click on the yellow button ‘Publish your paperback book’. This will take you back to the bookshelf page and let you know that your book is in review with KDP, this process normally takes around 72 hours (or less), KDP usually emails you to let you know once it’s live, but it’s worth logging back in and checking. Sometimes you need a little help, and self-publishing a book is no different, yes it can certainly be done from scratch without any prior experience, and many indie authors do this, but there are plenty of courses (free and paid) which will help you on your journey to publishing your own book and save you a great deal of time and stress in the process.
But where do you look for courses on self-publishing? Well, one of the first places can always be via a company where you may end up publishing you book with (in fairness, it’s in their own interest to have knowledgeable authors using their services). IngramSpark One of the biggest names in self-publishing is IngramSpark, they have a massive distribution and have been helping authors since 2013, so they know a thing or two about the industry. What’s more, they have their own online Academy which offers several free online courses to help you become a more successful and professional published author. Their Academy is free to join and certainly worth using, even if you don’t publish with Ingram, they can certainly teachyou a few things which will help on your publishing journey. YouTube Not just for idly wasting time, YouTube has a massive selection of channels aimed at self-publishing authors, some of these are great a will really help you get to grips with publishing and promoting your book. Now, because there is so much to choose from, here are a couple of channels you may want to check out first: Self-publishing with Dale – Self Publishing School – Lulu Press – Amazon KDP Again, all of these channels are free and offer countless hours of lessons and videos to help you become a highly successful author. Udemy This is an online academy which offers thousands of courses created by experts within their own fields, from learning how to code to self-publishing a book successfully, they offer everything you could want when it comes to learning how to publish. They do offer some of their courses for free, with the paid lessons ranging in price from $10 to $200 depending upon the course, what’s great is the review system and feedback, you can get a very good idea if the course is right for you prior to signing up. You can see some of our hand selected courses for Udemy here MasterClass Here you can learn from the very best within the writing world, from Neil Gaiman, R.L Stine, Malcolm Gladwell, Margaret Atwood and even Dan Brown. Their courses come as a 30 day subscription which is currently just $15, once subscribed you can also take advantage of all of the other masterclasses they offer (again, all from the biggest names within each individual area). However, this service seems to be more about developing your craft as a writer and author, so it may be good to use in conjunction with some of the other courses specifically aimed at the publishing side of things. But all the same, it’s great value and gives you insights from the most successful authors in the world. Find out more from their website here Masterclass. With the internet at your fingertips, you have access to an endless amount of information on how to publish, promote and sell your book to an audience, the only thing you need to do is start. Now that you’ve finished your draft manuscript, and maybe done some edits, you’ll need to get it proofread, and please don’t skip this part, feedback prior to going to print will really help with your book’s impression and reviews that it may receive.
So, how do you get your book proofread? Do-it-yourself? For many self-publishing authors this is the first option, but you have to be careful, when you are so close the manuscript you can fail to see where errors are. So, if you do decide to proofread your own book, wait, give it a couple of weeks leaving it completely alone. You need to take a break away from it so that you can return with a fresher pair of eyes and be more objective in its review. Consider printing it first. As crazy as it might seem, we tend to read things differently upon the screen in comparison to that on the printed page (we have also been told the same from countless authors). Once you have done your first proofread, upload and order a proof copy of your book and then go through the printed copy, you’ll be genuinely surprised at the issues you missed. Use software. In last week’s blog post, we looked at software which will help authors with editing, grammar and spelling (and many of these are free), now, this won’t tell you whether your book makes sense or is something that the public will go wild for, but it will help you in finding any issues that can easily be missed when reviewing your own work. Understand your own knowledge. Remember, it is impossible to know everything, but luckily there are those who know how to proofread that have created courses for you to learn the best techniques from. Online services such as Udemy have a seemingly limitless selection of courses aimed at anyone trying to learn something new. They also have a good selection of courses aimed at how to proofread (over 200 to choose from), a small selection of them are free, but most are around $15. So, before you try to ‘wing it’, check out the courses, they could save you a great deal of time and give you a far better result when complete. Enlist friends and family This is by far the most popular option for so many authors, but be careful, those closest to us tend to be less critical with feedback, of course, this comes from a place of love, but it doesn’t help with polishing your book. When getting people you know to read your book, tell them explicitly not to pull any punches and that this is a first draft, you want to make them feel comfortable when they give you their opinion that you won’t take it as an insult and become defensive, after all, they are doing you a favor, and I’m sure you still want to keep them as a friend. When friends and family read your work, they’ll hopefully find those errors you may have missed, but they’ll also normally give you an opinion on the book too, this can be great for editing purposes, again, as long as they are comfortable in giving you that feedback. Get a professional to do it This is the more costly approach, but it is the better option for most authors, getting a professional proofreader can cost anywhere between $10 per hour to $100 per hour, the large range denotes experience and the level of expertise that you are buying. Don’t forget why you’re doing it. Proofreading your book ensures that your manuscript is professional and is received by its audience in that manner too, people are quick to point out issues in reviews on Amazon, so your completed book needs to be free of basic errors and make sense when being read. It is time consuming, but so was writing it. Editing software has come a long way over the years. From the early days of just letting you know when you made a spelling mistake, it can now help you shape a paragraph into something that will read more professionally and give you an edge with your writing skills. This isn’t to say that you won’t still benefit from having a professional editor give your book the once over, but it will save you from a great number of edits, and if you are doing everything by yourself, it can stop basic mistakes in grammar from slipping through. The good news is that there are some great options for authors when choosing some editing software. Here are five options that you might want to consider. One – QuillBot Quillbot is a free online grammar checker, here you can copy and paste sections of writing into its online page, it will highlight errors and give solutions which can be applied quickly and with just one click. However, when writing a manuscript this option will not be that practical, so they also have extensions for Word and Doc, this allows you to edit as you go. The online site has options for paraphrasing sentences and summarizing them, which may come in handy when writing your book’s blog. A free site which offers a lot to the author, Quillbot is worth a look. Two – Scrivener Since its launch in 2007, Scrivener has gone on to become the most popular option for authors, allowing you to construct your book and offering lots of tools aimed at authors. However, it works best when integrated with other software such as Prowritingaid which will help with your grammar and editing. Scrivener is a great option and certainly gives an author helpful tools for all stages of writing and also comes with some free templates, but it can take a while to get to grips with using it and is more costly than most writing software options. Three – ProWritingAid Another incredibly popular editing software option, with more features than others, ProWritingAid integrates with more writing software than any other and with their premium service they have no word count or size limitations. They do offer a free version of the service, but it limits the review to 500 words, for most authors the premium is by far the better option and is priced at $79 for a year’s subscription. A reliable and precise tool for authors, ProWritingAid is trusted by many self-publishing authors to polish their manuscripts as they go. Four – Grammarly Grammarly has to be the most popular checker available right now, easy to download and integrates nicely into Word, you can easily adjust your writing as you go. It also integrates with your email and social media (basically anywhere you write on your computer), ensuring that your grammar is correct at all times. Grammarly is free but does offer premium options which (as you may already expect) can be better for authors, offering more in the way of editing tools, you can upload documents to be checked, but there are some limitations, it seems to be better when you have the extension within your writing software. Five – Hemmingway
Hemmingway is a free online writing app (you can download it for both Windows and Mac for a one off payment of $19.99), although it’s considered a bit more basic when alongside some of the other writing apps available, it is very straightforward and will certainly help you in improving your writing skills. It works by highlighting sections of your writing with different colors, these indicate any changes that you should consider making to the areas to make the sentence more powerful. The general consensus is that for a free app it will help your writing greatly and comes with tools to help you adjust your manuscript in ways which will improve its structure, it may not be the most powerful app available, but for free, it’s still very good. |
JD&J
Book cover designers. Archives
July 2022
CategoriesAll information within this website (including its blog) is published in good faith and for general information purposes only. JD&J Design LLC does not make any warranties about the reliability and accuracy of this information. Any action you take upon the information in this website is strictly at your own risk. JD&J Design LLC is not liable for any losses and/or damages in connection with the use of this site and information.
|