Creating a book cover design for any manuscript requires research and (most importantly) information from the actual author/publisher, this may sound a little obvious but sometimes this information can be a little slow in coming. It’s not unusual to work upon a project where the only information you’re initially given is a short sentence telling you that the cover needs to have a man on it and should look kind of dark and have a forest in there somewhere…… and that’s it. The first things you’ll ask yourself is, how old is the man, what does he look like, what’s his hair, eye and skin coloring? Does he have any unique features? What’s he wearing, what’s the time period, what’s the genre? Where is the location? Who is the book aimed at? And so on… What happens is that the author is so close to the novel that they take some of these small details for granted, and this is totally understandable too, if you’ve been working on a book for the past six to twelve months then you’ve gone past the point where these details seem as new and important as they did when you first started. When something occupies your mind as fully as your book and its characters for a long period of time, it becomes harder to view the overall concept from an external point of view, this is why having a professional editor work on your book is so important. When it then comes to working with a book cover designer, you do need to step back and think about your book’s concept and finer details, a great way to do this is to explain your book to a friend and get them to tell you what they understand about it. Can they describe your main character? Have they understood the genre and location? If not, then you will need to give them more information. One way around this is in the questionnaire that we use with every author and publisher, this asks questions about the book both technically and detailed around the concept and focal points. This helps to get the author to furnish as much information as possible and in a timeframe that allows for detailed reflection upon the book they’ve written. And this is a great process, focusing in on what your book is actually about helps with regards to the blurb and promotional synopsis for the book, condensing a book down into 300 words is far easier said than done, but it is an important element to the promotion and sale of the book.
So being prepared for the book cover design stage of the publishing process is helpful in both the aesthetics and synopsis, having the details condensed will help the cover and the sales copy. If you’re about to start on your cover, then stop and think about your book, what’s important and what information do you need to pass on to your book cover designer, the more relevant detail you consider now, the smoother the process.
0 Comments
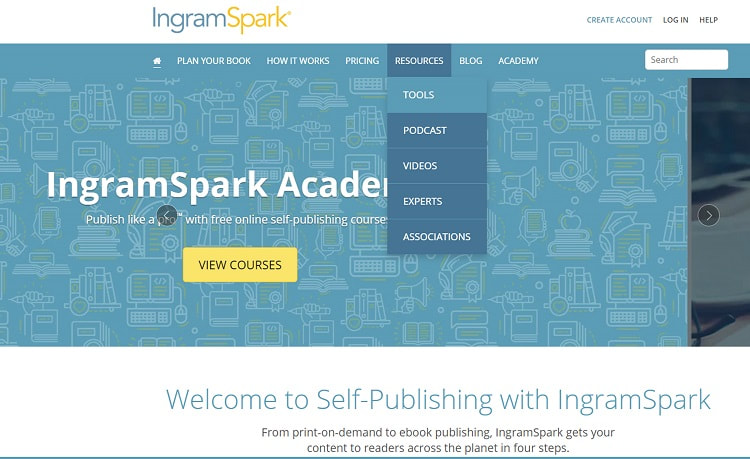
Creating a book cover design for Ingram Spark is a little more involved than some other publisher’s requirements, and this is where the use of Adobe products is helpful (and a necessity for the designer). Here at JD&J we use both InDesign and Photoshop when creating a book cover, we tend to create the artwork for the book cover design within Photoshop and then compile the cover itself within InDesign, we do it this way as the two work well together and Photoshop gives more scope for the artwork element within the book cover design. One great thing about Ingram is their use of templates, now you don’t have to use them, but we’ve found it better to do so and it can be a great way of checking the specifics of the layout before upload. Getting a template for your book is very straightforward too, from their website simply select ‘Resources’ then ‘Tools’, on this page scroll down to ‘Self-Publishing Templates’ and hit the yellow button, this then takes you to a page asking for the details of the book (note: if you have already uploaded your manuscript, once you type in the ISBN this form will then automatically update itself with the relevant info for your book). If you haven’t yet uploaded your manuscript you’ll need to fill it out manually. After the ISBN you should choose the trim size of your book, the trim size is the size that the book will be once completed, the actual size of the cover is normally bigger than this and then trimmed to the chosen dimensions, you have a choice of 30 trim sizes within Ingram, although most trade paperbacks stick to around three or four variations. Next you’ll choose the interior paper color and the binding type (Paperback/Dust Jacket/Case Laminate) and finally the finish, either gloss or matte. Enter in the details for your book’s page count (note: this is always in even numbers, so if your count is odd, go up by just one page). The next choice will be for the file type, you have the choice of two, InDesign or PDF, we tend to use both (so this does mean filling in the form twice), the InDesign file is ready to use with InDesign and the PDF we’ll use to make the artwork within Photoshop. Next add your email address and then finally the price of your book, currency (USD, CAD, GBP) and if you want the price in the barcode (most publishers recommend against adding a price as this can make promotions art a later date awkward). Next click on Submit and your template will be sent directly to your email address. Once you have both templates (PDF & INDD) you can start designing your book cover, load the PDF into Photoshop and then size the page to the outer edges of the bleed lines, this keeps the page manageable, make sure you use your guidelines to mark out where the trim, margins and spine edges are first. Next, load the INDD file into InDesign and create a new layer (above the Guides layer and under Layer 1, layer 1 has the barcode in). In this new layer (in our example it’s named layer 3) you’ll place the Photoshop file (the artwork for the book cover design). From here you can then add the copy for the book, the title, subtitle, author name, spine matter and copy for the back page, if you’re using Creative Cloud then you should have access to Adobe fonts, just make sure whichever fonts you do use, you have the correct license and authorization for (the same goes for your artwork too). Finally check your ink levels for the book cover design, go to separations preview, Ink Limit and set to 240%, any areas of your cover which are outside of this limit will show in red, if they do you will need to adjust the ink limit within Photoshop to under 240%. Once you’re happy with the cover you should export it, Ingram themselves recommend simply selecting the preset of PDF/X-1a:2001 and keeping all of its defaults as they are.
Once exported the file should be ready to then upload to Ingram and for use as your book cover, however, Ingram do have a lot of very useful information from their website, so if you're still a little unsure, check out their book cover guidelines which have everything you'll ever need to know in one hand PDF. |
JD&J
Book cover designers. Archives
February 2021
CategoriesAll information within this website (including its blog) is published in good faith and for general information purposes only. JD&J Design LLC does not make any warranties about the reliability and accuracy of this information. Any action you take upon the information in this website is strictly at your own risk. JD&J Design LLC is not liable for any losses and/or damages in connection with the use of this site and information.
|