|
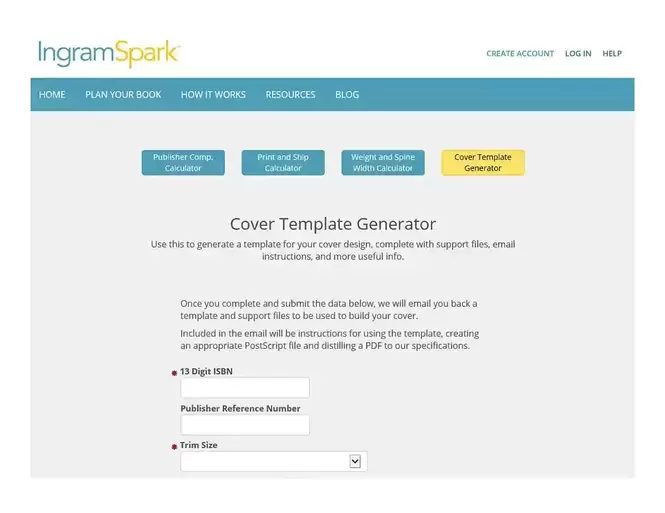
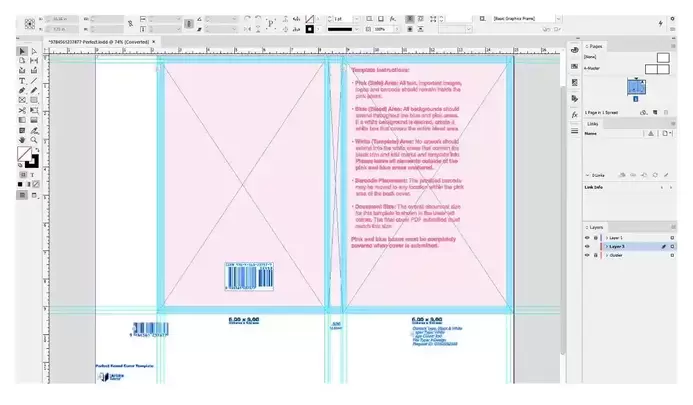
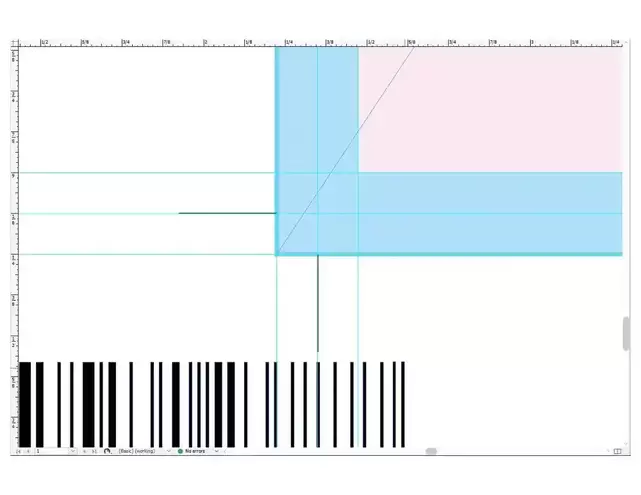
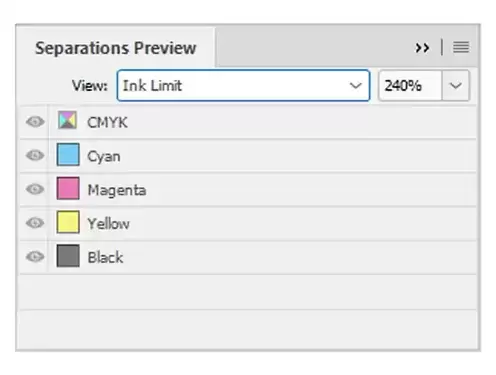
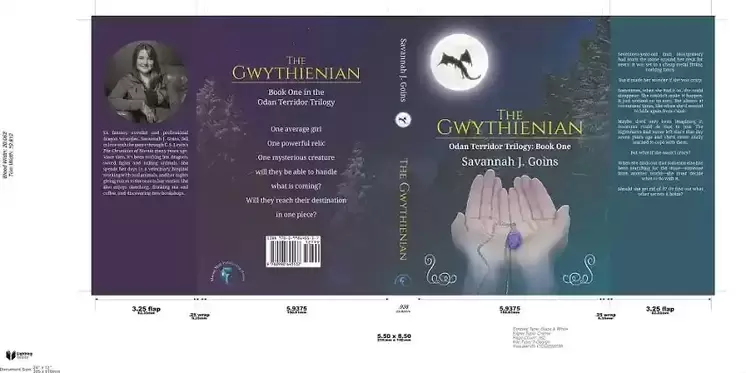
Creating a book cover design for an Indie publication will normally involve one of the major players in the Print On Demand industry, now for new authors who may not have published their book yet, the first thought will be of Amazon and it’s publishing wing Createspace. Createspace is a great way to market and is the first choice for many Indie writers, however, their choice of formats is smaller than that of Ingram Spark and you’ll also find some distribution differences too (which we won’t go into today). For the writer who wants to have their book as a hardback for instance, Ingram is a good choice and offers several options upon their website www.ingramspark.com, when we look at book cover design with Ingram they do offer a very useful template system, here you can simply enter the details of your book and they will then email the template directly to you. This template can be easily found under Resources and then Tools (from the dropdown menu), on the Tools page you’ll find a link half-way down which takes you to the cover template generator. From here it will ask you to input details of your book, first will be the ISBN, Trim Size (offering thirty variations on size in the dropdown), moving on to the paper type and then the binding type, on each choice it will give details on each choice you’re making. Finally, once you have the page count entered it will ask what file type you want the template to be, choose either INDD or PDF depending on how you’re creating the cover, we always use INDD as our printed book covers are always created with the use of InDesign. Under this you should enter your email address, it then has one last option regarding the price of the book and if you want this to show within the barcode, it also gives the choice of having the price in either US Dollars, UK Pounds or Canadian Dollars. Once you have entered in the relevant details and hit submit you should receive an email from Ingram Spark with the tailored template ready for you to use. Once you open this up in InDesign it will have everything laid out for you including very helpful guide lines to show the edges of everything for you. From here you will be able to build the book cover around the exact sizes needed for the book and by Ingram Spark, we tend to create a new layer and lock the two existing ones which come with the template itself. The book cover design template uses color coding to show you where to place elements that are important (such as the lettering etc.) and where not to, the pink sections are the safe areas where text and important elements within the book cover should be placed, the blue areas shouldn’t have any text in them and the white areas should have no part of the design or text in at all. The templates also mark out the trim lines and where the book cover design will be cut in the printing process, this helps when extending the artwork to the very edges of the blue areas. Like most book cover designers we create the actual image for the book cover itself in Photoshop and then ‘Place’ the image/artwork into InDesign as a separate layer, the working file in Photoshop needs to be created in CMYK, at 300 dpi and using ink levels of 240%. The great thing with Photoshop is that you can alter the ink levels of the image/design you are using very easily, however, it’s worth pointing out that it does tend to flatten the file for you, so once you’re happy with the design, save another version of it in PSD and then convert the ink levels. You can alter the ink levels by going to Edit > Convert to profile > Change the destination space to Custom CMYK > change the DOT gain to 25% and then alter the total ink limit to 238% (going slightly under allows for any fluctuation), then click on OK twice. If you now go back to InDesign and relink the image to the new flattened PSD file you will have the image at the correct levels, you will also need to check that any elements you have added in InDesign are also at 240%, so check the ink you have used for the text within the design. You can check to see if everything is okay by going to Window > Output > Separations Preview > View > Ink Limit and change the percentage to 240%. When you look at the cover design everything should be grey, if any element shows up red then it’s over the 240% and you’ll need to adjust it. Once you are happy with the ink levels and the design is ready for use, you’ll next need to export the file for print, to do this select File > Export > Save File Type as Adobe PDF (Print) (*.pdf) > export using [PDF/X-1a:2001] and keep the other settings as standard, don’t switch on the printer’s marks or to use document bleeds, in output you don’t need to alter the color conversion either.
You’ll then have a Print-ready PDF which is ready for use with Ingram Spark and can be uploaded on their website.
1 Comment
David Schutten
2/25/2021 18:16:24
Dear IngramSparks Helpers,
Reply
Your comment will be posted after it is approved.
Leave a Reply. |
JD&JCategories
All
Archives
July 2024
All information within this website (including its blog) is published in good faith and for general information purposes only. JD&J Design LLC does not make any warranties about the reliability and accuracy of this information. Any action you take upon the information in this website is strictly at your own risk. JD&J Design LLC is not liable for any losses and/or damages in connection with the use of this site and information.
|

